wordcloud
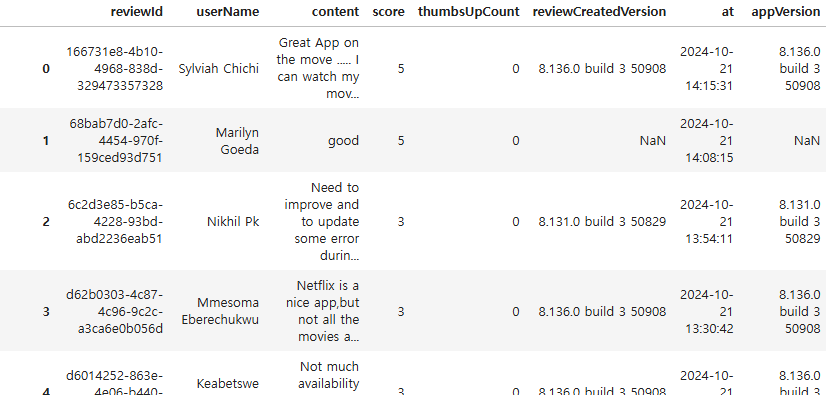
이번에는 지난번과 동일한 데이터셋에서 textblob을 이용해 리뷰가 긍정,중립,부정적인지 판단하고, 각각 세 가지 경우에서 사용된 단어들로 wordcloud를 만들어보겠다.
wordcloud: 텍스트에서 많이 등장할수록 크고, 굵은 폰트로 표시해서 자주 등장하는 단어를 한눈에 알아볼 수 있다.
전체코드
import pandas as pd
df=pd.read_csv('파일주소')
df['content']=df['content'].fillna('')
import nltk
from textblob import TextBlob
# 토픽 모델링을 위한 라이브러리
import gensim
from gensim import corpora
from gensim.utils import simple_preprocess
processed=df['content'].apply(simple_preprocess)
#표제어추출
from nltk.stem import WordNetLemmatizer
from nltk.corpus import wordnet
nltk.download('wordnet')
nltk.download('averaged_perceptron_tagger_eng')
lemmatizer=WordNetLemmatizer()
def get_wordnet_pos(tag):
if tag.startswith('J'):
return wordnet.ADJ
elif tag.startswith('V'):
return wordnet.VERB
elif tag.startswith('N'):
return wordnet.NOUN
elif tag.startswith('R'):
return wordnet.ADV
else:
return wordnet.NOUN
lemmatized = processed.apply(lambda x: [lemmatizer.lemmatize(word, get_wordnet_pos(tag))
for word, tag in nltk.pos_tag(x)])
df['content_c']=lemmatized.apply(lambda x: ' '.join(x))
def get_sentiment(text):
return TextBlob(text).sentiment.polarity
df['sentiment']=df['content_c'].apply(get_sentiment)
df['sentiment_label'] = df['sentiment'].apply(lambda x: 'positive' if x > 0.1 else ('negative' if x < -0.1 else 'neutral'))
import matplotlib.pyplot as plt
from wordcloud import WordCloud, STOPWORDS
stopwords = set(STOPWORDS)
stopwords.update(['use', 'account', 'now', 'netflix', 'movie', 'show', 'time', 'app', 'series', 'phone', 'movies', 'watch', 'shows', 'update', 'video', 'say', 'one', 'please', 'will', 'im'])
#부정리뷰
negative_content = df[df['sentiment_label'] == 'negative']['content_c']
negative_reviews=" ".join(content for content in negative_content)
wordcloud = WordCloud(width=800, height=400, background_color='white', stopwords=stopwords).generate(negative_reviews)
plt.figure(figsize=(12,6))
plt.imshow(wordcloud, interpolation='bilinear')
plt.axis('off')
plt.title('Negative Reviews Word Cloud')
plt.show()
#중립리뷰
neutral_content = df[df['sentiment_label'] == 'neutral']['content_c']
neutral_reviews=" ".join(content for content in neutral_content)
wordcloud = WordCloud(width=800, height=400, background_color='white', stopwords=stopwords).generate(neutral_reviews)
plt.figure(figsize=(12,6))
plt.imshow(wordcloud, interpolation='bilinear')
plt.axis('off')
plt.title('Neutral Reviews Word Cloud')
plt.show()
#긍정리뷰
positive_content = df[df['sentiment_label'] == 'positive']['content_c']
positive_reviews=" ".join(content for content in positive_content)
wordcloud = WordCloud(width=800, height=400, background_color='white', stopwords=stopwords).generate(positive_reviews)
plt.figure(figsize=(12,6))
plt.imshow(wordcloud, interpolation='bilinear')
plt.axis('off')
plt.title('Positive Reviews Word Cloud')
plt.show()

도구설명
nltk(natural language toolkit)는 자연어처리도구인데, 토큰화, 불용어제거, 어간추출(stemming), 표제어추출(lemmatizing) 등을 할 수 있다.
textblob은 감성분석, 언어번역, 문법교정등이 가능하다.
토픽모델링: 텍스트에서 숨겨진 주제를 찾아내는 기법
simple_preprocess는 문장을 단어 리스트로 바꾸고 대문자를 소문자로 변환하고 불필요한 기호를 없앤다.
corpora는 몇 가지 기능들이 있는데, 대표적으로 단어들을 벡터화하여 LDA모델을 학습시켜서, 문서가 어느 주제에 해당하는지 알아낼 수 있다. (그게 이번 과제에서 어떻게 사용되는지는..?)

apply는 각 열에 (또는 행에) 함수를 적용하게 해준다.
위 코드는 기존 데이터프레임의 'content' 열에 속한 모든 요소에 개별적으로 simple_preprocess를 적용해서 processed에 저장했다.
참고로 preprocess를 적용하기전에 결측치를 찾아서 fillna('')로 NaN값을 공백으로 만들어줬다.

표제어 추출(lemmatization)
표제어추출은 단어를 사전의 기본형으로 바꾸는 것이다.
ex)loves, liked, having, happily -> love, like, have, happy
반면 어간추출은 단순히 어간을 잘라내는 것이다. 따라서 변형이 때로는 부정확할 수 있다.
ex)loves, liked->love, like
having-> hav
happily->happi
def get_wordnet_pos(tag)
표제어 추출 전 단어마다 품사태깅을 해주는 함수이다.
품사태깅을 하지 않으면 표제어추출기는 모든 단어를 명사로 간주한다. 따라서 cats ->cat 으로는 잘 변환되지만, was->be loving->love 같은 변환은 되지 않는다.
lemmatized = processed.apply(lambda x: [lemmatizer.lemmatize(word, get_wordnet_pos(tag))
for word, tag in nltk.pos_tag(x)])
복잡하지만 앞에서부터 차례로 보면
lemmatized= processed.apply(lambda x:...)
-> processed라는 시리즈 객체를 하나씩 가져와서, lambda 함수를 적용한다.
이 lambda 함수는 어떤 함수나면
lambda x: [lemmatizer.lemmatize(word, get_wordnet_pos(tag)) for word, tag in nltk.pos_tag(x)]
x는 processed의 각 행을 의미한다.
nltk.pos_tag(x)는 x에 있는 단어와 품사태그 쌍을 반환한다.
ex)
x=[i, love, my, cat]
nltk.pos_tag(x)=[(i,noun), (love, verb), (my, adjective), (cat, noun)]
따라서 for word, tag in nltk.pos_tag(x) 에서 word=i , tag=noun
lemmatizer.lemmatize() 는 표제어를 추출하는 함수 이름
이 함수에 전달하는것이 word, get_wordnet_pos(tag) 이다. word와 tag는 위의 예시에서 각각 i와 noun 이었다.
get_wordnet_pos(tag)는 tag를 받아서 lemmatizer,lemmatize가 이해하는 형식으로 변환해주는 함수이다.]
즉 이 코드는 processed 각 행마다 안에 있는 단어에 품사태깅을 해서 표제어 추출기에 넘겨준 결과를 lemmatized에 저장하는 코드인 것이다.

이제 이렇게 만들어진 것을 textblob에 넘겨줘서 감성을 분석하고 싶은데, textblob은 문장형식으로 줘야지 이렇게 하나하나 떨어진 단어 리스트는 못받는다. 그래서 join으로 다 합쳐줘야 한다.

df['content_c']=lemmatized.apply(lambda x: ' '.join(x))
여기서x는 lemmatized의 각 행을 의미한다. 각 행마다 공백을 기준으로 요소들을 쭉 연결하라는 의미
그리고 그렇게 연결한 결과를 content_c 라는 새로운 열을 만들어 거기다 저장했다.

def get_sentiment(text):
return TextBlob(text).sentiment.polarity
get_sentiment라는 함수를 정의하는 부분
TextBlob(text) 는 문자열을 받아 분석가능한 객체로 변환하고,
그 결과를 sentiment에 남고 있다. sentiment는 polarity와 subjectivity 두 가지 정보가 있는데, 지금은 polarity 정보만 가져왔다. polarity는 감정을 -1에서1사이의 숫자로 나타내는데, -1에 가까우면 부정적, 1에 가까우면 긍정적, 0이면 중립적인 감정이다.
df['sentiment']=df['content_c'].apply(get_sentiment)
'content_c'의 각 행마다 get_sentiment함수를 저장해서 그 결과를 새로운 sentiment 열에다 저장

df['sentiment_label'] = df['sentiment'].apply(lambda x: 'positive' if x > 0.1 else ('negative' if x < -0.1 else 'neutral'))
조건문을 활용해서 sentiment가 0.1보다 크면 긍정, -0.1보다 작으면 부정, 그 사이면 중립
참고로 apply() 안에 lambda를 쓰는 경우 중 하나가 바로 이렇게 조건을 적용해야 할 때이다.
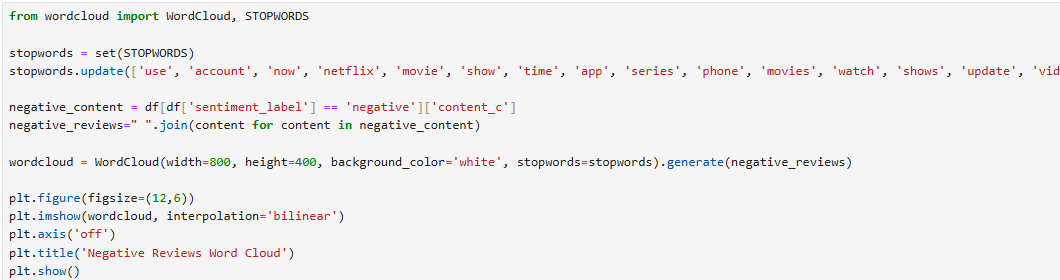
이제 wordcloud를 만들어보겠다. 우선 부정적인 리뷰의 wordcloud
stopwords = set(STOPWORDS)
stopwords(불용어): 텍스트 분석에서 제외하는 단어들 ex)the, a, and..
STOPWORDS는 기본으로 제공되는 불용어 목록인데, set( STOPWORDS)를 해서 이 목록을 set자료형으로 변환했다. 이렇게 하면 중복을 자동으로 제거한다.
그리고 이것을 stopwords에 저장했다.
stopwords.update(['use', 'account', 'now', 'netflix', 'movie', 'show', 'time', 'app', 'series', 'phone', 'movies', 'watch', 'shows', 'update', 'video', 'say', 'one', 'please', 'will', 'im'])
stopwords안에 분석에서 제외하고 싶은 단어들을 추가하는 코드
wordcloud = WordCloud(width=800, height=400, background_color='white', stopwords=stopwords).generate(negative_reviews)
wordcloud를 만들기 위해 크기와 배경색등을 지정해주고, generate뒤에 wordcloud에서 분석할 텍스트를 넣어주는 코드
그런데 이 때 바로 content_c를 넣으면 안된다. 워드클라우드는 문자열만 입력을 받기 때문에 content_c에서도 부정적으로 분류된 리뷰들을 전부 하나의 긴 문자열로 붙여서 가져다 줘야 한다.
negative_content = df[df['sentiment_label'] == 'negative']['content_c']
negative_reviews=" ".join(content for content in negative_content)
긴 문자열로 붙이는 코드
df[df['sentiment_label'] == 'negative']
우선 부정적으로 라벨링된 부분만 골라줘야 한다.
이 코드를 실행하면 데이터프레임중 sentimental label=negative만 나온다.

negative_content = df[df['sentiment_label'] == 'negative']['content_c']
이 데이터프레임에서 content_c 열만 선택해서 negative_content에 저장했다.

이렇게 negative_content라는 새로운 데이터프레임을 만든 후
negative_reviews=" ".join(content for content in negative_content)
이렇게 join으로 전부 붙여준다.
왜 apply를 안쓰고 join만 썼나?
당연하다 왜냐면 join 자체가 이미 시리즈의 모든 요소를 결합하는 거라서 자체로도 반복적으로 각 행을 돌면서 결합하고 있다. 위에서 apply를 적용한 이유는 행 안에서 ['how', 'are', 'you'] 이렇게 분리되어 있어서 각 행마다 join을 수행해야 하기 때문이다.
지금은
1행에서 join 수행: ['how', 'are', 'you']-> [how are you]
2행에서 join 수행: ['im', 'fine', 'thank', 'you']->[im fine thank you]
3행에서 join 수행: ['and', 'you']-> [and you]
... 이 아니라
1행+2행+3행+.. -> [how are you im fine thank you and you]를 하고 있기 때문에 join만 쓰는것

neutral, positive에도 같은 작업을 해준다.
generate뒤에 neutral review와 positive review로 바꿔주는 것을 잊지 말자

